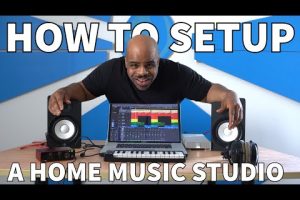
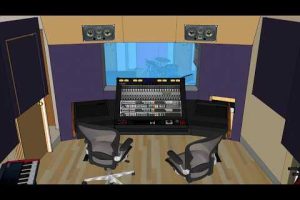
Setting up a configuration home studio is one of the most rewarding investments a musician, podcaster, or content creator can make. Whether you are recording vocals, producing beats, mixing audio, or streaming live sessions, the way you configure your home studio directly impacts the quality of every project you touch. A poorly arranged setup leads to frustrating reverb issues, muddy recordings, and wasted time — while a thoughtfully designed studio puts professional-grade results within reach. This guide walks you through everything you need to know about designing, building, and optimizing your configuration home studio, from budget-friendly starter gear to advanced acoustic treatment strategies.
What Is a Home Studio Configuration?
A home studio configuration refers to the complete arrangement of hardware, software, acoustic treatment, and workflow design that allows you to create, record, and produce audio in a residential space. It is not simply about buying equipment — it is about selecting the right combination of tools, placing them strategically, and structuring your environment so that sound behaves predictably. The ideal configuration home studio balances your creative goals with practical constraints like room size, budget, and intended use case. Whether your focus is music production, voiceover work, podcasting, or beat-making, the configuration you choose shapes every aspect of your output.
Essential Gear for Your Home Studio Setup

Every configuration home studio needs a core set of equipment. Understanding what each piece does — and why it matters — helps you make informed purchasing decisions without overspending on gear you do not actually need.

Audio Interface
The audio interface is the backbone of any home studio. It converts analog signals from microphones and instruments into digital data your computer can process, and vice versa. When selecting an interface for your configuration home studio, consider input count, preamp quality, latency performance, and connectivity options. For beginners, a two-input interface with USB-C connectivity covers the vast majority of use cases. Intermediate producers often benefit from models offering ADAT expansion, allowing them to add more inputs as their projects grow.
Microphones and Accessories
Your microphone choice depends heavily on what you are recording. Large-diaphragm condenser microphones excel at vocals and acoustic instruments, while dynamic microphones handle high-pressure sources like amplified guitars and loud vocal styles. A configuration home studio should include at least one versatile condenser and one dynamic microphone to cover a wide range of recording scenarios. Pop filters, shock mounts, and XLR cables are non-negotiable accessories that dramatically improve signal quality.
Monitors and Headphones
Studio monitors and headphones serve complementary roles. Nearfield monitors placed at ear height and angled toward your listening position give you an accurate picture of your mix. Closed-back headphones are essential for tracking vocals and instruments without bleed. A well-configured studio uses both tools together to ensure translations sound great across different playback systems.
Computer and Storage
Your computer determines how many tracks, plugins, and virtual instruments you can run simultaneously. A machine with a modern multi-core processor, at least 16 GB of RAM, and a dedicated SSD for your project files will handle demanding sessions without stuttering or crashes. External drives provide backup and archive storage, keeping your work safe and your system responsive.
Room Acoustics and Sound Treatment
Many aspiring producers underestimate how much room acoustics affect their recordings. Even the most expensive microphone and interface combination will produce disappointing results in an untreated room. A proper configuration home studio addresses three core acoustic concerns: reflection control, bass management, and external noise isolation.
Start by identifying first reflection points — the spots on walls, ceiling, and floor where sound bounces directly into your microphone. Placing acoustic absorption panels at these locations reduces flutter echo and produces a cleaner recorded signal. Bass traps in room corners tame low-frequency buildup that causes muddiness in mixes. Diffusion panels scatter remaining reflections, creating a natural sense of space without adding problematic coloration.
For isolation, consider dense curtains, sealed door gaps, and floor decoupling platforms. These measures prevent outside noise from leaking into your recordings and stop your studio from disturbing neighbors or household members.
Software and Digital Audio Workstations
Your DAW is the digital workspace where all your creative decisions happen. Popular options include Pro Tools, Ableton Live, Logic Pro, and FL Studio. Each offers a unique workflow suited to different production styles. Ableton Live excels at electronic music and live performance, while Logic Pro provides an all-in-one solution with excellent built-in instruments. Pro Tools remains the industry standard for professional recording and mixing, and FL Studio is widely favored among beat makers and hip-hop producers.
Your plugin ecosystem complements your DAW choice. Essential plugin categories include equalizers, compressors, reverb, delay, and virtual instruments. Many modern configuration home studio setups rely on free or affordable plugin bundles from developers like TDR, Voxengo, and Spitfish before investing in premium collections from companies like Universal Audio, FabFilter, or Waves.
Budget vs. Premium Home Studio Configuration
Not every configuration home studio requires a massive investment. The table below compares starter, mid-range, and professional setups so you can identify the right tier for your current stage and goals.
| Category | Starter ($200–$500) | Mid-Range ($500–$1,500) | Professional ($1,500–$5,000+) |
| Audio Interface | Budget 2-in/2-out USB | 4-in/4-out with premium preamps | 8-in/8-out with ADAT and high-end converters |
| Microphone | One versatile condenser | Condenser + dynamic pair | Multiple mics including ribbon and specialty options |
| Monitors | Entry-level nearfield pair | Mid-tier 5-inch or 6.5-inch monitors | Premium 8-inch or larger three-way systems |
| Acoustic Treatment | Basic foam panels | Professional absorption + bass traps | Full room treatment with diffusion and decoupling |
| DAW | Free or built-in software | Industry-standard DAW license | Pro Tools Ultimate or Logic Pro with extensive plugin suite |
| Best For | Beginners exploring production | Intermediate creators building a serious setup | Professionals and full-time producers |
Starting with a budget configuration home studio is not a compromise — it is a strategic decision that lets you develop your ear and refine your skills before investing in higher-end gear. Many experienced engineers still use starter-level interfaces and microphones for specific tasks, proving that skill and technique matter far more than price tags.
Step-by-Step Home Studio Configuration Guide
Follow this structured approach to build your configuration home studio methodically:
- Define your primary use case. Decide whether you are focused on recording vocals, producing electronic music, mixing, podcasting, or a combination. Your use case drives every gear and room decision.
- Choose the right room. Select the smallest, quietest room available. Avoid rooms with large windows, parallel walls, or excessive hard surfaces. Bedrooms, closets, and dedicated spare rooms all work well when treated properly.
- Set up your desk and monitor position. Place your monitors in an equilateral triangle with your listening position. Keep monitors away from walls to reduce bass buildup. Your desk should allow comfortable access to all hardware.
- Install acoustic treatment. Mount absorption panels at first reflection points, place bass traps in corners, and add diffusion on the rear wall behind your listening position.
- Connect and configure your audio interface. Install drivers, set your buffer size for optimal latency, and route inputs and outputs within your DAW.
- Calibrate your monitors. Use measurement software or a reference track to set appropriate monitor levels, typically around 79–85 dB SPL at your listening position.
- Build your signal chain. Plan your recording chain from microphone to interface to DAW, ensuring clean gain staging at every stage.
- Test and iterate. Record a test track, mix it, and compare against reference material. Adjust placement, treatment, and settings based on what you hear.
Expert Tips for Optimizing Your Configuration Home Studio
- Use reference tracks. Compare your mixes against professionally produced songs in a similar genre. This practice trains your ear and reveals imbalances you might otherwise miss.
- Invest in cable management. Organized cables reduce interference, prevent accidental disconnections, and make troubleshooting faster when issues arise.
- Learn gain staging. Keeping levels healthy at every point in your signal chain prevents noise, distortion, and headroom problems before they ever reach your mix.
- Monitor at multiple volumes. Checking your work at low, medium, and high volumes reveals different problem areas and ensures your mix translates across playback systems.
- Document your signal flow. Keep a simple diagram or written record of how your gear is connected. This saves enormous time when troubleshooting or recreating sessions.
- Prioritize your listening environment. Even the most expensive microphone sounds bad in a poorly treated room. Acoustics should be your first investment, not your last.
Frequently Asked Questions
What is the best configuration home studio for a beginner with no experience? A beginner should start with a budget audio interface, one large-diaphragm condenser microphone, closed-back headphones, a basic DAW like Reaper or GarageBand, and a few acoustic foam panels. Focus on learning signal flow, gain staging, and room acoustics before adding expensive gear. This approach builds foundational skills that transfer to any future upgrade.
How do I choose the right room for my configuration home studio? Select a room with minimal outside noise, limited window space, and asymmetrical dimensions to reduce standing waves. Small rooms are easier to treat acoustically. Avoid rooms with tiled floors or large glass surfaces, as these create harsh reflections that degrade recording quality.
What is the minimum budget for a functional configuration home studio in 2024? A fully functional setup can be built for as little as $200 to $300, using a budget USB audio interface, a free or trial DAW, a basic condenser microphone, and DIY acoustic treatment. Many successful professional tracks have been produced entirely on setups costing under $500, demonstrating that creativity and knowledge outweigh expensive equipment.
How important is acoustic treatment compared to buying expensive microphones? Acoustic treatment is arguably more important than microphone quality. A $100 microphone in a treated room will always outperform a $1,000 microphone in an untreated room. Reflections, standing waves, and ambient noise from an untreated space introduce problems that no microphone — regardless of price — can fix during recording or mixing.
Can I use headphones instead of studio monitors for my configuration home studio? Headphones are excellent tools for tracking, editing, and detailed mixing work. However, they should supplement — not replace — studio monitors for mix evaluation. Headphones color frequency response in ways that differ from monitors, and relying exclusively on headphones can lead to mixes that sound unbalanced on speakers or in cars and phones.
What is the single most impactful upgrade for an existing configuration home studio? Adding proper acoustic treatment to your room delivers the most noticeable improvement for the least cost. Even basic bass traps and absorption panels at first reflection points transform recording clarity and mix accuracy more dramatically than swapping out microphones or upgrading your audio interface.
Conclusion
A well-planned configuration home studio is more than a collection of expensive equipment — it is a thoughtfully designed environment where creativity meets technical precision. From selecting the right audio interface and microphone to treating your room acoustically and building an efficient workflow, every decision in your setup contributes to the quality of your finished work. Whether you are taking your first steps into music production or refining a professional-grade operation, the principles outlined in this guide give you a solid foundation. Start with what you can afford, prioritize your listening environment, invest in your skills, and let your configuration home studio evolve alongside your craft. The best studio is the one that inspires you to create consistently and helps you capture your ideas with clarity and confidence.