


Setting up an audio recording studio is one of the most exciting and transformative investments a musician, podcaster, or content creator can make. Whether you are a solo artist laying down vocals in a bedroom closet or a professional engineer designing a world-class tracking room, the way you configure your recording environment directly shapes the quality of every session. A thoughtfully planned audio recording studio setup eliminates unwanted noise, captures pristine sound sources, and gives you the creative freedom to produce broadcast-ready content from home or a dedicated facility. In this comprehensive guide, we will walk through every critical element of building a studio that works for your goals, your budget, and your ambitions.
Understanding the Core Components of a Recording Studio
Before purchasing a single piece of gear, it helps to understand the architecture of a complete audio recording studio setup. Every functional studio shares several foundational components, and skipping or underestimating any one of them will limit your results.
The primary categories include:
- Acoustic Treatment: Panels, bass traps, diffusers, and bass management solutions that control reflections and standing waves.
- Audio Interface: The external soundcard that converts analog signals to digital and vice versa.
- Microphones: Condenser, dynamic, and ribbon mics tailored to different sound sources.
- Studio Monitors and Headphones: Reference-grade speakers and closed-back headphones for accurate monitoring.
- DAW Software: Digital Audio Workstation software for recording, editing, mixing, and mastering.
- Cabling, Stands, and Accessories: XLR cables, mic stands, pop filters, shock mounts, and monitor isolation pads.
Each of these elements plays a non-negotiable role. Many beginners obsess over the microphone or the DAW, but neglecting room acoustics or monitor quality will undermine every recording you make.
Choosing the Right Room and Acoustic Treatment

Room selection is arguably the most important decision in your entire studio build. A beautifully treated closet can outperform a massive untreated garage. When evaluating potential spaces, consider the following factors.
Room Size and Geometry
Rectangular rooms are preferable to square ones because parallel walls create flutter echoes and standing waves that are notoriously difficult to tame. Larger rooms generally offer more low-frequency accuracy, while smaller rooms benefit from closer monitoring distances and more aggressive acoustic treatment.
Basic Acoustic Treatment Strategy
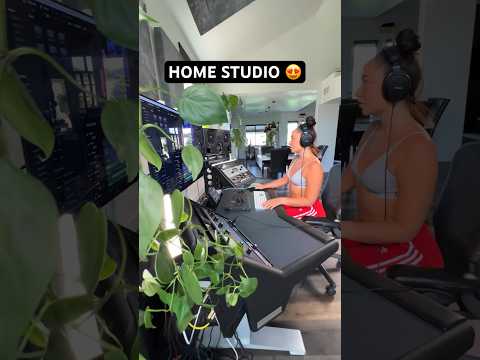
A practical approach to treating a recording space includes:
- Bass traps in all four corners to manage low-frequency buildup.
- Absorption panels at first reflection points on the side walls, ceiling, and behind the monitors.
- A diffuser on the rear wall to scatter reflections without deadening the room entirely.
- Floor covering such as a thick rug to reduce early reflections off hard surfaces.
These steps do not require a professional studio budget. DIY acoustic panels made from rigid fiberglass and fabric wrapping can dramatically improve clarity for a fraction of commercial product prices.
Essential Gear: Audio Interface, Microphones, and Monitors
With your room prepared, the next phase is selecting core recording equipment that matches your workflow and budget tier.
Audio Interfaces

The audio interface serves as the central hub of your studio. It converts analog audio signals into digital data your computer can process and vice versa. Popular interfaces from brands like Focusrite Scarlett, Universal Audio Apollo, and MOTU M-Series offer varying channel counts, preamp quality, and connectivity options. For a solo creator, a two-input USB interface is typically sufficient. Professional studios often invest in interfaces with ADAT expansion, allowing dozens of simultaneous inputs through optical connectivity.
Microphones
A versatile starter microphone collection includes at least one large-diaphragm condenser for vocals and acoustic instruments, one dynamic microphone for louder sources like guitar amplifiers and snare drums, and one ribbon microphone for smooth, warm tonal character on brass, room ambience, or electric guitar cabinets.
Studio Monitors and Headphones
Nearfield studio monitors positioned at ear height and roughly five to six feet from the listening position deliver the most accurate representation of your mix. Pair these with a quality pair of closed-back headphones for tracking and mixing in noisy environments. Models from Yamaha HS Series, KRK Rokit, and Neumann KH series are widely trusted in professional environments.
Software and DAW Selection
Your Digital Audio Workstation is where every recording takes shape. The best DAW for your studio depends on your genre, workflow preferences, and collaboration needs.
Popular options include:
- Logic Pro — A comprehensive, Mac-native solution with excellent built-in virtual instruments and effects.
- Ableton Live — Ideal for electronic music production and live performance workflows.
- Pro Tools — The industry standard for professional recording and post-production environments.
- Studio One — Known for its intuitive drag-and-drop workflow and powerful mixing console.
- Reaper — A lightweight, highly customizable option favored by budget-conscious producers.
Many DAWs offer free trials or entry-level editions, allowing you to test the workflow before committing to a purchase.
Studio Setup Tiers: Beginner, Intermediate, and Advanced
Understanding where you fit on the experience spectrum helps you allocate budget wisely and avoid both under-investment and overspending on features you do not yet need.
Beginner Studio Setup (Budget: $300–$800)
A functional beginner studio prioritizes essentials: a basic USB audio interface, one or two versatile microphones, a pair of budget studio monitors, entry-level headphones, free or low-cost DAW software, and minimal acoustic treatment such as foam panels or DIY absorbers. This tier is perfect for podcasting, voiceover work, singer-songwriters, and hobbyists learning the fundamentals of recording and editing.
Intermediate Studio Setup (Budget: $800–$2,500)
An intermediate setup adds a second audio interface or a higher-end unit with better preamps, a wider microphone collection, quality nearfield monitors, improved acoustic treatment with corner bass traps, and a professional DAW license. This tier supports full band tracking, multi-mic drum sessions, and polished podcast production.
Advanced Studio Setup (Budget: $5,000+)
Professional-grade studios feature dedicated acoustically treated rooms, high-end microphones from manufacturers like Neumann, Shure SM7B chains, premium monitoring systems, multiple interfaces or analog console routing, outboard compression and EQ hardware, and advanced cable management and signal routing infrastructure.
Gear Comparison by Tier
| Category | Beginner | Intermediate | Advanced |
| Audio Interface | Focusrite Scarlett Solo/2i2 | Universal Audio Volt 276 | Apollo x8p / RME Fireface |
| Microphones | 1 condenser + 1 dynamic | 3-5 mics including ribbon | Full collection + specialty mics |
| Monitors | Budget nearfield pair | Yamaha HS7 / KRK Rokit 7 | Neumann KH 310 / Augspurger |
| Acoustic Treatment | DIY panels + rug | Commercial panels + bass traps | Professional room calibration |
| DAW | Reaper / GarageBand | Logic Pro / Studio One | Pro Tools Studio / Nuendo |
Expert Tips for Optimizing Your Recording Studio
Seasoned engineers and producers consistently emphasize practices that separate amateur setups from professional ones:
- Monitor at moderate volumes. Listening too loud fatigues your ears and masks mix problems. Working at conversational volume reveals imbalances faster.
- Invest in cable management. Cable runs act as antennas for electromagnetic interference. Use high-quality XLR cables and keep them away from power cords.
- Use a reference track. Compare your mix against a professionally produced song in a similar genre to identify tonal balance issues.
- Calibrate your monitoring level. Set a consistent reference SPL (typically around 79–85 dB SPL at the listening position) so your ears adapt to a predictable baseline.
- Document your signal chain. Recording which microphones, preamp settings, and processing plugins you used for each session saves enormous time during recall sessions.
Frequently Asked Questions
What is the most important piece of equipment in a home recording studio setup?
The audio interface is the most critical component because it determines your conversion quality, preamp transparency, and overall signal integrity. A high-quality interface paired with modest microphones will outperform a premium microphone plugged into a low-quality built-in soundcard every time.
How do I set up a small bedroom recording studio for vocals?
Place your microphone away from walls to minimize reflections, hang heavy blankets or install absorption panels behind the mic, use a pop filter and shock mount, and record in a closet filled with clothing if untreated walls are unavoidable. A cardioid dynamic microphone such as the Shure SM7B or Rode PodMic works exceptionally well in small spaces.
What is the best budget audio recording studio setup for beginners in 2024?
A Focusrite Scarlett Solo or 2i2 interface, an Audio-Technica AT2020 condenser microphone, a pair of KRK Rokit 5 monitors, closed-back headphones like the Sony MDR-7506, acoustic foam panels from a budget brand, and Reaper or GarageBand software form a capable setup for under $600.
Do I need acoustic treatment if I am only recording podcasts?
Yes. Even spoken-word recordings benefit enormously from basic acoustic treatment. Reflections off hard walls create a “roomy” sound that is difficult to fix in post-production. Absorption panels behind the speaker and a rug on the floor significantly improve vocal clarity and reduce the need for aggressive noise reduction processing.
Can I use studio monitors for mixing and headphones for tracking in the same setup?
Absolutely. This is standard practice in both home and professional studios. Closed-back headphones provide isolation during recording so the monitors do not bleed into the microphone. Studio monitors are then used for mixing and critical listening when no microphone is capturing live audio.
Conclusion
Building an audio recording studio setup is a journey of deliberate decisions, incremental improvements, and creative problem-solving. The most successful studios are not defined by the price tag on their equipment but by the intentionality behind every choice — from the dimensions of the room to the placement of a single acoustic panel. Start with the essentials, treat your space with care, invest in monitoring accuracy, and continuously refine your environment as your skills and ambitions grow. A well-designed studio empowers you to capture performances that move people, regardless of whether you are recording your first podcast episode or producing a full-length album in a professional facility.