


If you have ever stepped inside a professional recording studio and wondered why the walls are covered in those distinctive wedge-shaped pieces of foam, you are not alone. Acoustic foam panels for home studio environments have become one of the most popular and cost-effective sound treatment solutions for musicians, podcasters, voice-over artists, and content creators who want cleaner, more professional audio without spending thousands on a commercial facility. But not all foam panels are created equal, and simply gluing blocks of foam to your walls will not magically transform your room into a broadcast-quality recording space. This guide breaks down everything you need to know about selecting, installing, and optimizing acoustic foam panels for your home studio, whether you are a complete beginner or an experienced producer looking to refine your setup.
What Are Acoustic Foam Panels and Why Do Home Studios Need Them?
Acoustic foam panels are lightweight, porous sound absorption devices designed to reduce unwanted reflections, echoes, and resonances within an enclosed space. They are typically made from open-cell polyurethane foam or melamine foam and feature patterns such as pyramids, wedges, egg-crate shapes, or flat surfaces depending on their intended purpose. In a home studio, untreated rooms create a host of problems: flutter echoes between parallel walls, bass buildup in corners, and muddy recordings that require extensive post-production cleanup. Acoustic foam panels address these issues by absorbing mid-to-high frequency sound waves, preventing them from bouncing off hard surfaces and interfering with your recordings and mixes.
The key distinction that many beginners miss is that acoustic foam panels are not soundproofing materials. Soundproofing blocks sound from entering or leaving a room, which requires mass, density, and decoupling techniques. Acoustic treatment, on the other hand, controls the sound inside the room. Understanding this difference is critical to setting realistic expectations for your home studio project.
Types of Acoustic Foam Panels for Home Studio Use
Not all acoustic foam is the same, and choosing the right type depends on your room size, recording needs, and budget. Here are the most common varieties you will encounter.
Wedge Panels
Wedge-shaped panels are the classic look associated with professional studios. They feature triangular protrusions that scatter and absorb sound energy across a broad frequency range. These panels work well for general-purpose room treatment and are ideal for vocal booths and control rooms where you need smooth, even absorption without harsh coloration.
Pyramid Panels
Pyramid foam panels offer a slightly deeper profile than wedge designs, which gives them enhanced low-mid frequency absorption. They are a popular choice for podcasters and home studio owners who need effective broadband absorption without taking up excessive wall space.
Flat Panels and Bass Traps
Flat surface panels made from high-density foam or fiberglass covered in fabric provide clean, minimalist absorption and are excellent for early reflection points. Bass traps are thicker, denser panels specifically engineered to absorb low-frequency energy that accumulates in room corners. For any home studio, a combination of flat panels and corner bass traps delivers the most balanced acoustic result.
Egg-Crate Foam
Often sold as budget options, egg-crate foam has a minimalistic pattern that provides light absorption. These are suitable for small rooms with minor echo problems but will not deliver the depth of treatment needed for serious recording or mixing work.
How to Place Acoustic Foam Panels for Maximum Effectiveness
Placement matters just as much as the panels themselves. Even premium acoustic foam will underperform if installed incorrectly. Here is a practical placement strategy for home studios of all sizes.
- Identify your first reflection points. Sit at your mixing position and have a friend slide a mirror along the side walls. Wherever you can see your monitors in the mirror is a first reflection point. Place acoustic foam panels at these locations first.
- Treat the wall behind your monitors. The wall directly behind your speakers is a critical reflection zone. A flat absorption panel here prevents sound from bouncing back into the stereo image.
- Cover the corners with bass traps. Low-frequency energy pools in corners regardless of room size. Place thick bass traps or foam corner fill in every vertical corner of your studio.
- Address the ceiling. If your ceiling is low enough, install cloud panels or ceiling-mounted acoustic foam between your listening position and the ceiling to reduce vertical reflections.
- Leave some reflective surfaces. Over-treating a room with foam deadens it completely, which can make mixing feel unnatural. A balance of absorption and reflection creates a more accurate monitoring environment.
Beginner vs. Advanced Placement Tips
If you are just starting out, focus on the first reflection points and the corners behind your listening position. These two areas alone will dramatically improve clarity and reduce room modes. Advanced users should also consider diffusion panels on the rear wall to scatter remaining reflections and create a more natural sense of space.
Buying Guide: What to Look for in Home Studio Acoustic Foam Panels
When shopping for acoustic foam panels for your home studio, several technical specifications and practical factors should guide your decision.
Density and Thickness
Thicker panels absorb lower frequencies. For meaningful low-mid and bass treatment, choose panels at least 2 inches thick, and 4 inches for corner bass traps. Density matters too; higher density foam (typically 2 to 4 pounds per cubic foot) absorbs more sound energy than lightweight alternatives. Cheap foam from generic retailers is often too thin and low-density to provide any real acoustic benefit.
Fire Rating and Safety
Look for panels that carry a Class A or Class B fire rating. This is especially important in a home studio where equipment generates heat and electrical wiring is present. Most quality acoustic foam manufacturers include fire-retardant treatment in their products.
Installation Method
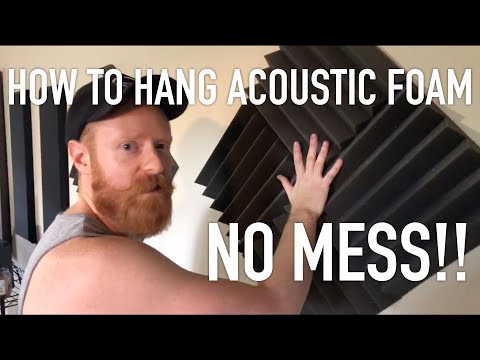
Peel-and-stick adhesive backing is convenient but may damage walls or paint upon removal. Command-style mounting strips, pin mounting, or French cleat systems offer safer alternatives, especially if you rent your studio space. Consider whether you need permanent or temporary installation before purchasing.
Coverage Area
A general rule of thumb is to cover 20 to 35 percent of your room’s wall surface with absorption panels. Smaller rooms benefit from slightly more coverage, while larger rooms require less to avoid an overly dead sound. Use an online room acoustic calculator to estimate the square footage of treatment you need.
| Panel Type | Best Frequency Range | Ideal Thickness | Best For |
| Wedge Panels | Mid to High | 2–4 inches | General room treatment |
| Pyramid Panels | Broadband | 2–4 inches | Podcasts, vocals |
| Flat Absorption Panels | Mid Frequency | 2–4 inches | First reflection points |
| Bass Traps | Low Frequency | 4+ inches | Room corners |
| Egg-Crate Foam | High Frequency | 1–2 inches | Budget light treatment |
Acoustic Foam Panels vs. Other Home Studio Treatment Options
While acoustic foam panels are versatile and affordable, they are not the only option for treating a home studio. Comparing foam panels to alternative materials helps you make an informed decision based on your specific needs.
| Feature | Acoustic Foam | Fiberglass Panels | Mineral Wool |
| Absorption Range | Mid to High | Broadband | Broadband, Excellent Low |
| Thickness for Low Freq | 4+ inches needed | 3–4 inches | 3–4 inches |
| Cost per Panel | Low to Medium | Medium | Medium to High |
| Fire Resistance | Varies | High (with facing) | Excellent |
| Ease of Installation | Very Easy | Moderate | Moderate |
| Appearance | Professional look | Fabric-wrapped, clean | Functional, utilitarian |
Fiberglass panels wrapped in acoustic fabric offer superior broadband absorption and are often the preferred choice for serious mix environments. Mineral wool, such as Rockwool, provides excellent density and fire resistance, making it ideal for DIY bass traps and wall insulation within a studio build-out. Acoustic foam panels remain the best choice for beginners, podcasters, and small vocal booths where ease of installation and a clean aesthetic are priorities.
Expert Tips for Getting the Best Results from Your Acoustic Foam
Even experienced studio owners make mistakes when treating their rooms. Here are expert-level recommendations that will elevate your setup.
- Do not cover every surface. A completely foam-lined room sounds unnatural and fatiguing to listen to. Leave some reflective surfaces, especially on the floor and rear wall, to maintain a sense of natural ambience.
- Use an measurement microphone and software. Tools like REW (Room EQ Wizard) allow you to measure the frequency response of your room before and after treatment, giving you data-driven insight into what areas still need attention.
- Combine absorption with diffusion. After addressing problematic reflections with foam panels, add diffusers to the rear wall or ceiling to scatter remaining sound energy. This preserves a sense of liveliness without introducing comb filtering or flutter echoes.
- Clean your panels regularly. Foam surfaces attract dust, which reduces their absorption efficiency over time. Vacuum gently with a brush attachment every few weeks.
- Consider modular panels. Instead of permanently mounting foam, use freestanding panel frames or gobos (go-betweens). These allow you to reposition treatment as your recording needs change.
Conclusion
Acoustic foam panels for home studio applications are one of the highest-return investments you can make for your recording and production workflow. They are affordable, easy to install, and immediately noticeable in the clarity and quality of your audio. The key is to approach treatment strategically rather than decoratively—understand your room’s problem areas, select the right panel types and thicknesses, and place them at scientifically proven reflection points. Whether you are building a bedroom vocal booth, a podcast recording space, or a full mixing control room, the right acoustic foam panel setup will bring your home studio a significant step closer to professional sound quality.
Frequently Asked Questions
1. How many acoustic foam panels do I need for a small home studio?
For a small room of approximately 100 to 150 square feet, plan to use between 12 and 20 panels of 2×4 feet each, depending on the severity of reflections and the amount of bass buildup. Start with first reflection points and corner bass traps, then add more panels as needed based on your listening experience.
2. Can acoustic foam panels completely soundproof my home studio?
No. Acoustic foam panels are designed for internal sound treatment, not sound isolation. To soundproof a room, you need mass-loaded vinyl, resilient channels, double drywall, and sealed gaps around doors and windows. Foam panels control reflections and resonances within the space but do not prevent sound from passing through walls.
3. What is the best thickness of acoustic foam for a home studio?
Two-inch panels are the minimum effective thickness for most home studio applications, absorbing frequencies from approximately 500 Hz and above. Four-inch panels extend useful absorption down into the 125 Hz range, making them significantly more effective for bass control and low-mid frequency issues that commonly plague small rooms.
4. How do I clean and maintain acoustic foam panels?
Use a handheld vacuum with a soft brush attachment to remove surface dust. Avoid using water, cleaning sprays, or solvents, as these can degrade the foam structure and reduce its acoustic absorption properties. In humid environments, ensure adequate ventilation to prevent mold growth on foam surfaces.
5. Are DIY acoustic foam panels worth building?
DIY panels using rigid fiberglass or mineral wool wrapped in breathable fabric can be more cost-effective than pre-made foam, especially for large coverage areas. However, they require precise cutting, fire-rated fabric, and proper mounting hardware. For beginners, commercially produced acoustic foam panels offer a simpler, faster, and more consistent starting point.