


The best acoustic panels for home studio setups can mean the difference between a polished, professional-sounding recording and a muddled mess of reflections, standing waves, and unwanted noise. Whether you’re building your first bedroom studio or upgrading an existing space, understanding how sound treatment works—and which panels deliver real results—is absolutely critical. In this comprehensive guide, we break down everything from beginner basics to advanced broadband absorption techniques, review the top-performing acoustic panels on the market, and give you expert placement strategies that actually work. This is your complete roadmap to achieving studio-grade sound in any home environment.

Why Acoustic Panels Are Non-Negotiable for Home Studios
Before diving into product recommendations, it’s important to understand why acoustic panels matter so much. A typical home room is full of hard, reflective surfaces—drywall, windows, hardwood floors, and ceilings that bounce sound waves around uncontrollably. These reflections create comb filtering, flutter echoes, and coloration that ruin vocal takes, muddy instrument recordings, and make mixing decisions unreliable.
Acoustic panels for recording studio environments absorb mid-to-high frequency sound energy, reducing problematic reflections while preserving the natural tonal balance of your source material. Without proper treatment, even the most expensive microphones and monitors can’t save you from a poorly treated room.
The Core Problems Acoustic Panels Solve
- Flutter echoes — repetitive bouncing between parallel walls
- Standing waves — low-frequency buildup in room corners
- Excessive reverberation — makes recordings sound boomy and unclear
- External noise intrusion — when combined with mass-loaded vinyl or sealed panels
- Monitor translation issues — poor treatment leads to bad mixing decisions
How to Choose the Right Acoustic Panels: A Beginner’s Guide
Not all acoustic panels are created equal. The market is flooded with options ranging from cheap foam tiles to high-density fiberglass boards wrapped in premium fabric. Knowing what to look for will save you money and prevent frustrating purchases that gather dust on shelves.
Understanding NRC Ratings and Why They Matter
The Noise Reduction Coefficient (NRC) is the single most important specification to check. It measures how much sound energy a panel absorbs on a scale from 0.00 (total reflection) to 1.00 (total absorption). For home studio use, aim for panels with an NRC of at least 0.80. Premium fiberglass panels regularly achieve 0.90 or higher, while standard acoustic foam panels hover around 0.50 to 0.70 depending on thickness.
Foam Acoustic Panels vs Fiberglass: The Real Difference
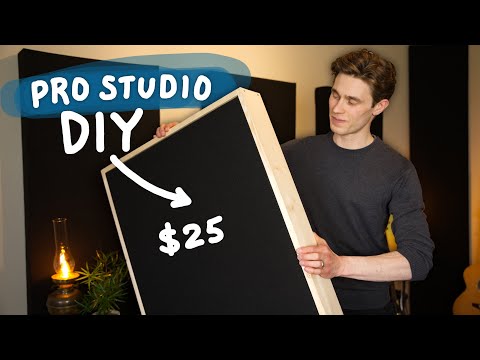
This is one of the most searched debates in home studio design. Here’s the truth: fiberglass panels significantly outperform foam in broadband absorption, especially at lower frequencies. Foam panels are lightweight, affordable, and visually appealing, but they primarily tackle high frequencies above 1kHz. Fiberglass panels—particularly those with 3-inch or greater depth—effectively absorb sound down to 250Hz and below when properly installed.
Top Acoustic Panels for Home Studios in 2024
Budget-Friendly Options Under $50
For beginners working with tight budgets, several options deliver surprisingly decent performance. Look for 2-inch foam panels with fabric wrapping, or budget fiberglass panels from brands like Auralex or ATS Acoustics. While these won’t solve deep bass issues, they’re excellent starting points for controlling first reflections and reducing general room echo.
- Auralex Foamily Panels — lightweight, easy to install, NRC around 0.55
- ATS Acoustics Panel — fiberglass core, NRC 0.80+, excellent value
- Kelowna MD Acoustic Foam — budget foam with decent high-frequency absorption
Mid-Range Performers ($50–$150)
Mid-range panels represent the sweet spot for most home studio owners. At this price point, you get genuine fiberglass or mineral wool construction with proper edge diffusion and strong NRC ratings.
- GIK Acoustics 244 Bass Trap — versatile panel for walls and corners, NRC 1.00
- Primacoustic London Bass Trap — dense fiberglass, outstanding low-mid absorption
- Auralex ProPanel — professional-grade fabric-wrapped fiberglass
Premium Choices for Serious Producers
If you’re running a professional-grade home studio acoustic treatment setup, premium panels are worth every dollar. These products use high-density fiberglass, offer superior broadband absorption, and often feature custom fabric options for aesthetic integration.
- AGC Studios Custom Panels — hand-built, NRC 1.00, available in multiple depths
- Owens Corning 703 — raw fiberglass board, industry gold standard (requires DIY wrapping)
- RPG Radiant Absorbers — engineered for diffusion plus absorption
Acoustic Panel Comparison: Quick Reference Table
| Product | Type | Thickness | NRC | Price Range | Best For |
| Auralex Foamily | Foam | 2 inch | 0.55 | $20–$40 | Beginner, first reflections |
| ATS Acoustics Panel | Fiberglass | 2 inch | 0.80+ | $40–$70 | Budget mid-range |
| GIK 244 Bass Trap | Fiberglass | 4 inch | 1.00 | $70–$120 | Corners, bass control |
| Primacoustic London | Fiberglass | 3–4 inch | 0.95+ | $90–$150 | Full-range absorption |
| Owens Corning 703 | Fiberglass board | 2–4 inch | 1.00+ | $40–$80 (board) | DIY premium treatment |
Where to Place Acoustic Panels for Maximum Impact
Studio acoustic panels placement is arguably more important than which panels you buy. Even the best absorption panels will underperform if installed in the wrong locations. Follow these priority zones:
- First reflection points — the spots on side walls and ceiling where sound from your monitors bounces before reaching your ears. Sit in your mix position and have someone slide a mirror along the wall; wherever you see a monitor, that’s a reflection point to treat.
- Behind the monitors — rear wall absorption prevents reflections from bouncing back into your listening position.
- Room corners — floor-to-ceiling bass traps in all four vertical corners dramatically reduce low-frequency buildup. This is where broadband absorbers and specialized bass traps earn their keep.
- Ceiling between monitors and listening position — a single ceiling cloud panel can tame comb filtering significantly.
- Around the recording space — if your vocal booth shares the room, add panels on nearby walls to reduce bleed.
Advanced Acoustic Treatment Strategies
Once you’ve covered first reflections and basic corner treatment, consider these intermediate-to-advanced techniques that separate good studios from great ones:
Hybrid Absorption and Diffusion
Complete reduce echo in home studio strategies combine absorption panels with diffusers. While absorbers remove energy, diffusers scatter reflections in multiple directions, preserving a sense of liveliness. Place diffusers on the rear wall behind your listening position—this maintains spatial ambience without problematic reflections reaching your ears. Companies like RPG and Vicoustic offer hybrid panels that both absorb and scatter simultaneously.
Layered Broadband Absorption
For serious low-frequency control, stack panels at different depths or use graduated-depth broadband absorbers. A 4-inch panel absorbs down to roughly 300Hz, while an 8-inch arrangement can tackle frequencies as low as 125Hz. This layered approach to soundproof panels for home studio construction is how professional studios handle modal problems without resorting to prohibitively expensive room correction software.
Dealing with Glass and Windows
Large windows are common in home studios and create problematic reflections. Heavy drapes help partially, but the most effective solution is installing absorptive panels directly over or adjacent to glass surfaces. Acoustic window plugs made from Owens Corning 703 wrapped in fabric and sealed in a wooden frame can dramatically reduce both external noise intrusion and internal reflections.
Expert Tips for Maximum Sound Quality
Follow these proven recommendations from experienced studio designers:
- Don’t over-treat. A completely dead room sounds unnatural and makes mixing exhausting. Aim for controlled liveliness, not total silence. You want to reduce reflections, not eliminate all acoustic energy.
- Leave one reflective surface. Many engineers keep the desk-side wall partially reflective to maintain a sense of openness during long sessions.
- Prioritize corners over walls. Bass energy concentrates in corners. Spending your budget on corner bass traps before covering every wall inch is the smartest allocation strategy.
- Use broadband absorbers, not purely tuned membrane absorbers. Unless you have a specific frequency problem, broadband panels provide more even, predictable results across the spectrum.
- Seal gaps meticulously. Even the best acoustic panels for music production lose effectiveness if sound leaks around their edges. Use acoustic caulk and tight-fitting installations.
- Combine treatment with proper speaker placement. Equilateral triangle monitoring, away from walls, reduces the burden on your panels significantly.
Frequently Asked Questions
What are the best acoustic panels for a small home studio under 100 square feet?
For small rooms, prioritize broadband fiberglass panels with NRC ratings above 0.80. GIK Acoustics 244 and ATS Acoustics Panels are excellent choices. Focus heavily on corner bass traps since small rooms suffer disproportionately from modal buildup between 60–300Hz. Thinner 2-inch panels work for first reflection points, but invest in 4-inch minimum panels for corners and rear walls.
Can acoustic foam panels effectively reduce echo in a home studio?
Standard acoustic foam panels provide moderate high-frequency absorption but struggle significantly with mid-range and low-frequency energy. For reduce echo in home studio applications, foam works as a supplement—not a primary treatment. Fiberglass or mineral wool panels deliver far superior broadband results and address the frequency ranges where most problematic echoes occur.
How many acoustic panels do I need for a typical home recording studio?
A general rule of thumb: cover 25–40% of wall and ceiling surface area with absorptive panels. For a standard 10×12 foot room, this translates to roughly 8–12 panels depending on size. Always start with first reflection points, then corners, then rear wall. Acoustic treatment needs vary dramatically based on room dimensions, construction materials, and intended use.
Are fabric-wrapped fiberglass panels better than raw fiberglass for home studios?
Both perform similarly acoustically when properly constructed. Fabric wrapping provides fire safety compliance, aesthetic appeal, and prevents fiberglass fibers from becoming airborne. Raw Owens Corning 703 boards are the same material but require DIY wrapping. Professionally wrapped panels from brands like GIK or Primacoustic offer convenience and peace of mind without acoustic compromise.
What’s the difference between acoustic panels and soundproofing panels?
Soundproof panels for home studio applications block sound transmission between spaces using mass, decoupling, and damping (mass-loaded vinyl, resilient channels, double drywall). Acoustic panels absorb sound energy within a room to control reflections. They serve completely different purposes—soundproofing prevents noise from entering or leaving, while acoustic treatment improves the internal sonic character of your space.
How far from the wall should broadband absorbers be placed?
To maximize low-frequency absorption, leave a 2–4 inch air gap between the back of the panel and the wall surface. This air cavity extends the panel’s effective absorption range downward in frequency. For broadband absorbers in corners, mounting directly in the corner with minimal gap still delivers strong results, but the air gap technique provides noticeably deeper frequency performance.
Final Thoughts
Choosing the best acoustic panels for home studio success comes down to matching your specific room needs, budget, and recording goals with the right combination of absorbers, diffusers, and strategic placement. Start with broadband fiberglass panels at first reflection points and corners—this foundation alone will transform your monitoring accuracy and recording quality. From there, expand into hybrid treatments, bass traps, and advanced configurations as your workflow demands. Remember: great recordings start in the room itself, not at the mixing console. Invest wisely in your acoustic treatment, and every subsequent session will benefit enormously from the clarity and control that proper sound treatment provides.