


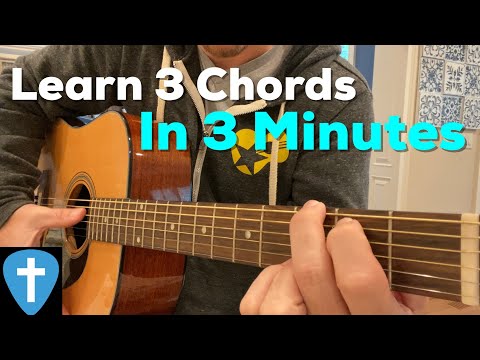
If you’ve ever picked up a guitar and wondered how to play your favorite songs, the answer almost always starts the same way: with a beginner guitar chord chart. Whether you’re a complete novice who just bought your first instrument or someone who has been strumming for a few weeks without real structure, understanding how chord charts work is the single most important milestone on your musical journey. A well-designed chord chart doesn’t just show you where to place your fingers — it gives you a visual roadmap to unlock hundreds, even thousands, of songs. In this comprehensive guide, we’ll break down everything from the basic guitar chords you need to learn first, to intermediate open chord shapes and advanced voicings that will elevate your playing to the next level.

What Is a Beginner Guitar Chord Chart and Why It Matters
A beginner guitar chord chart is essentially a visual diagram that shows you exactly which frets and strings to press to form a specific chord on the guitar neck. These charts typically display six vertical lines representing the six strings of the guitar, and horizontal lines representing the frets. Dots or numbered markers indicate where your fingers should be placed, while an “X” or “O” at the top tells you which strings to mute or play open. Think of it as a cheat sheet designed to translate music theory into something your hands can actually do.
For new players, chord charts eliminate the guesswork. Instead of trying to figure out complex finger positions by ear alone, you get a clear, structured reference that accelerates your learning curve dramatically. Professional guitar instructors almost universally begin lessons with chord charts because they build both muscle memory and theoretical understanding simultaneously. Mastering these diagrams early on also prepares you to tackle strumming patterns, fingerpicking techniques, and eventually songwriting.
Why Visual Learning Works for Guitarists
Research in music education consistently shows that visual learners pick up chord shapes faster than those relying solely on tablature or audio. A guitar chord chart for beginners taps into spatial reasoning — your brain maps the physical layout of your fretboard in a way that abstract numbers and letters alone cannot achieve. This is why nearly every reputable method book, app, and online resource leads with chord diagrams as a foundational tool.
The Essential Open Chords Every Beginner Must Learn
Before diving into more complex shapes, you need to build a solid foundation with what guitarists call the “open chords.” These are chords that use at least one open (unfretted) string, making them easier to press and more resonant to play. Here are the fundamental basic guitar chords that should be the very first items on your practice list:
- C Major — One of the most commonly used chords in popular music. Its bright, warm tone fits into countless chord progressions.
- G Major — A powerful, full-sounding chord that pairs naturally with C and D.
- D Major — Compact and widely used, especially in upbeat, energetic songs.
- Em (E Minor) — Arguably the easiest chord to play, requiring only two fingers.
- Am (A Minor) — A staple in emotional and melancholic songwriting.
- E Major — A versatile chord that appears in rock, folk, pop, and blues.
- A Major — Frequently used in country and pop ballads.
These seven open chord shapes form the backbone of most beginner-friendly songs. Once you can transition smoothly between them, you’ll be able to play a staggering variety of material. Many popular guitar chord charts for beginners focus exclusively on these shapes before introducing anything more advanced.
Mini Chords: The Simplest Starting Point
If full open chords feel overwhelming at first, consider starting with “mini chords” or three-note versions of the essential shapes. A mini C chord, for example, might use only the top three strings. These simplified versions let you build finger strength and dexterity gradually without the frustration of stretching across a wide fretboard span. As your confidence grows, you can expand to the full voicing.
How to Read a Guitar Chord Chart Like a Pro
Reading a chord diagram might seem intimidating, but the system is remarkably logical once you understand the conventions. Here’s a quick breakdown of what each element means:
- Vertical lines represent your six guitar strings, with the low E (thickest) string on the left and the high E (thinnest) string on the right.
- Horizontal lines represent the frets. The thick bar at the top is the nut of the guitar.
- Dots indicate where to press down. Numbers inside or near the dots show which finger to use (1 = index, 2 = middle, 3 = ring, 4 = pinky).
- Red “X” means do not play that string.
- “O” means play that string open (unfretted).
- Grayed-out or shaded frets indicate barre chords where one finger presses across multiple strings.
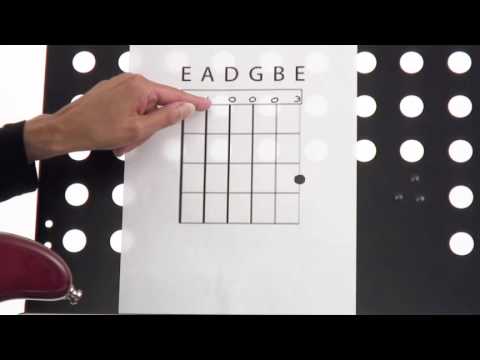
Once you internalize this visual language, you can pick up any chord chart — whether it’s in a songbook, on a website, or inside a mobile app — and start practicing immediately. This universal system is one reason guitar chord charts remain the most popular learning tool across every genre and skill level.
Beginner Guitar Chord Progressions to Master First
Individual chords are important, but the real magic happens when you combine them into chord progressions. A chord progression is simply a sequence of chords played in a specific order, and it forms the harmonic foundation of virtually every song you’ll ever play. Here are the most common beginner progressions to practice:
- I – V – vi – IV (e.g., C – G – Am – F): This is arguably the most famous progression in modern music, used in hits across pop, rock, and country.
- I – IV – V (e.g., C – F – G): A classic three-chord progression found in blues, rockabilly, and early rock and roll.
- vi – IV – I – V (e.g., Am – F – C – G): Widely used in emotional ballads and pop anthems.
- I – ii – iii – IV (e.g., C – Dm – Em – F): A rising progression that sounds uplifting and forward-moving.
Practice transitioning between these pairs until your fingers move automatically. A useful technique is to focus on the “anchor finger” — the finger that stays in a similar position between two chords, providing a connection point that makes transitions smoother and faster.
Intermediate Open Chord Shapes to Level Up Your Playing
Expanding Your Chord Vocabulary
Once you’ve mastered the essential open chords, it’s time to expand your palette. Intermediate guitar chord charts introduce shapes that add color, tension, and sophistication to your playing. These include:
- Sus2 and Sus4 Chords — Suspended chords replace the third with either the second or fourth degree, creating a sense of anticipation. Asus2 and Asus4 are incredibly popular in alternative and indie rock.
- 7th Chords — Adding a seventh note to a basic chord introduces richness and bluesy flavor. C7, G7, and D7 are approachable starting points.
- Add9 Chords — These add the ninth scale degree to a standard triad, producing a dreamy, expansive quality favored in pop and R&B.
- Minor 7th Chords — Em7, Am7, and Dm7 bring a mellow, jazzy quality to progressions without demanding complex fingerings.
Incorporating these into your practice routine alongside the basic guitar chords you already know will dramatically expand your harmonic vocabulary and make you a far more versatile player.
Comparison: Open Chords vs. Barre Chords

| Feature | Open Chords | Barre Chords |
| Finger Pressure Required | Light to moderate | Heavy (one finger across strings) |
| Ease of Playing | Beginner-friendly | Intermediate to advanced |
| Resonance | Full, open ringing | Denser, muted warmth |
| Mobility | Fixed position | Moveable anywhere on neck |
| Typical Introduction | First weeks of learning | After 2–6 months of practice |
Advanced Chord Shapes and Voicings
For players ready to push beyond the basics, advanced chord voicings open up entirely new sonic possibilities. These include drop 2 and drop 3 voicings commonly used in jazz, extended chords featuring 9ths, 11ths, and 13ths, and chromatic passing chords that add sophisticated movement between diatonic shapes. Power chords — typically just the root and fifth — are essential for rock and metal players, offering aggressive, distorted tones that drive high-energy performances. While these advanced guitar chord charts may seem daunting at first, they become accessible through consistent, deliberate practice and a deep understanding of the fretboard layout. Start by learning one new advanced voicing per week and integrate it into songs you already know.
Common Mistakes Beginners Make with Chord Charts
Even with the best resources, new players often fall into traps that slow their progress. Avoid these frequent errors:
- Ignoring finger placement precision — Placing fingers too close to the fret wire or too far from it causes buzzing. Always press right behind the fret line.
- Skipping the check of each string individually — Strum all six strings after forming a chord. If any buzz or sound muted, adjust your finger angle or pressure.
- Practicing too fast — Slow, deliberate transitions build clean muscle memory. Speed comes naturally later.
- Using only one chord chart source — Different charts may show different fingerings for the same chord. Compare multiple reliable sources and choose what feels most comfortable for your hand size.
- Neglecting to tune the guitar before practice — An out-of-tune guitar makes every chord sound wrong, no matter how perfect your finger placement is.
Expert Tips for Memorizing Chords Faster
Memorizing guitar chord shapes doesn’t have to be a tedious grind. Try these proven strategies:
- Group chords by shared finger positions. For example, C Major and A Minor share a similar hand shape. Learning in clusters reduces cognitive load.
- Use the “ring and recall” method. Form a chord, hold it for five seconds, release, then try to recreate it from memory. Repeat until accurate.
- Practice chord changes to a metronome. Start at 60 BPM, alternating between two chords on each beat. Increase tempo gradually.
- Apply chords to real songs immediately. Contextual practice cements shapes far better than isolated drills. Pick easy songs built from your current chord vocabulary.
- Draw chord diagrams by hand. The act of physically writing out a guitar chord chart for beginners activates spatial memory pathways that digital repetition doesn’t fully engage.
Frequently Asked Questions
What is the easiest chord to learn on guitar for absolute beginners?
The Em (E Minor) chord is widely considered the easiest guitar chord because it requires only two fingers — typically the middle and ring finger — placed on the second fret of the A and D strings. Its simplicity makes it an ideal starting point, and it sounds surprisingly musical even with minimal effort.
How long does it take to memorize a beginner guitar chord chart?
With consistent daily practice of 15 to 30 minutes, most players can comfortably memorize the first five to seven open chords within two to four weeks. The key is spaced repetition — short, frequent sessions are far more effective than infrequent marathon practices.
Should I learn chord charts or tablature first?
If your primary goal is playing songs with vocals and accompaniment, learning guitar chord charts first is strongly recommended. Chords give you the harmonic framework of music. Tablature is better suited for learning specific melodies, riffs, and solos. Ideally, you’ll eventually become comfortable with both systems.
Can I use a beginner guitar chord chart on an electric guitar?
Absolutely. Chord diagrams apply identically to acoustic and electric guitars. The only difference is that electric guitars often have thinner necks and lighter gauge strings, which can make pressing chords slightly easier, especially for beginners with weaker finger strength.
What are barre chords and when should I start learning them?
Barre chords involve pressing one finger across all or most strings on a single fret while the other fingers form the chord shape above. They are moveable — meaning you can play the same shape anywhere on the neck to play different chords. Most players are ready to begin learning barre chords after two to six months of consistent practice, once their index finger has developed sufficient strength.
How do I practice chord transitions effectively?
Isolate the two chords you’re struggling with. Alternate between them slowly — four beats per chord — and focus on making your transitions as smooth as possible. Use a metronome, increase speed only when you can play cleanly at the current tempo, and integrate the pair into actual songs as soon as you feel confident. This approach builds real-world fluency rather than just theoretical knowledge.
Conclusion
Mastering the beginner guitar chord chart is far more than a preliminary exercise — it is the gateway to genuine musicianship. From the first open chords that make a song recognizable to the advanced voicings that distinguish a skilled player from a casual strummer, every stage of your development is built on the foundation these diagrams provide. Stay patient, practice with intention, and revisit your charts regularly even as you advance. The guitar rewards consistency, and every chord you add to your repertoire brings you closer to the freedom of expressing yourself through music. Start with the basics, build your confidence through real songs, and progressively challenge yourself with intermediate open chord shapes and beyond. Your future as a capable, expressive guitarist begins with a single chart and a single chord — so pick up your guitar and start today.