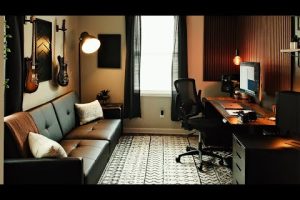
Building a sound studio from the ground up is one of the most rewarding projects any musician, podcaster, or content creator can undertake. Whether you are a beginner looking to record your first vocal track or an experienced engineer searching for a professional-grade environment, the way you design and equip your space will directly impact the quality of every recording you make. A well-built sound studio is not just about expensive gear; it is about understanding room acoustics, selecting the right equipment, and creating a workflow that inspires creativity. In this comprehensive guide, we will walk you through every critical step of building a sound studio, from room selection and acoustic treatment to gear recommendations and budget planning, so you can create a space that delivers broadcast-ready results every single time.
Why Building a Sound Studio Is Worth the Investment
Many people assume that a professional sound studio is only for major labels and wealthy producers. The truth is, building a sound studio at home or in a dedicated space has never been more accessible. Modern recording software, affordable monitors, and high-quality microphones have leveled the playing field dramatically. When you invest in building your own sound studio, you gain complete creative control over your projects. You eliminate expensive hourly booking fees, avoid commute time, and work on your own schedule. Beyond convenience, a properly designed studio gives you the ability to produce clean, professional audio that stands up to commercial standards. Whether your goal is recording music, producing voiceovers, mixing tracks, or launching a podcast, a dedicated sound studio becomes your creative command center.
Planning Your Sound Studio: Room Selection and Layout
The single most important decision you will make when you build a sound studio is choosing the right room. Even the most expensive equipment cannot compensate for a poorly chosen space. Before purchasing a single piece of gear, spend time evaluating potential rooms and understanding how their physical characteristics will affect your recordings.
Choosing the Right Room for Your Sound Studio
Look for a room that is rectangular rather than square. Square rooms create standing waves and flutter echoes that cause frustrating frequency buildups and dead spots. A rectangular space gives you more flexibility in speaker placement and helps distribute sound more evenly. Avoid rooms with large windows, as glass reflects sound aggressively and introduces unwanted external noise. Ideally, choose a room with minimal hard, reflective surfaces. Basements and interior rooms away from street traffic tend to offer the best starting point. Think about electrical outlets as well; you will need multiple grounded outlets for your interface, monitors, computer, and other equipment without relying on power strips that can introduce hum.
Room Dimensions and Their Acoustic Impact
Room size matters significantly when you build a sound studio. Very small rooms under 100 square feet are extremely challenging to treat acoustically because low-frequency buildup dominates the space. A room between 150 and 400 square feet offers a sweet spot for most home and project studios. The ceiling height also plays a role; taller rooms allow low frequencies to disperse more naturally. Use online room mode calculators to identify problematic resonances based on your specific dimensions before you begin treatment planning.
Sound Treatment and Acoustic Panels: The Foundation of Your Studio
Acoustic treatment is the backbone of any functional sound studio. Many beginners confuse soundproofing with acoustic treatment, but they are two entirely different concepts. Soundproofing prevents sound from entering or leaving the room, while acoustic treatment controls how sound behaves inside the room. To build a sound studio that sounds professional, you need both, but acoustic treatment is where most of your focus should go.
Absorption vs. Diffusion: Understanding the Difference
Absorption reduces reverberation by soaking up sound energy, particularly in the mid and high frequency ranges. Thick acoustic foam panels, mineral wool bass traps, and heavy fabric panels are common absorption materials. Diffusion, on the other hand, scatters sound waves in multiple directions, preserving a sense of natural liveliness while eliminating harsh reflections. The best sound studios use a combination of both. A common strategy is to place absorption panels at first reflection points on the side walls, install bass traps in all four corners, and add diffusers on the rear wall behind the listening position.
- First Reflection Points: Place absorption panels where sound from your monitors first hits the side walls before reaching your ears.
- Bass Traps: Install thick, dense corner bass traps to control low-frequency buildup, which is the hardest frequency range to manage in small rooms.
- Ceiling Treatment: Hang acoustic clouds or ceiling panels above the listening position to reduce vertical reflections.
- Floor: Use a thick rug or carpet with a dense underlay to minimize floor reflections.
Essential Equipment for Building a Sound Studio
The gear you choose will define the capabilities and ceiling of your sound studio. You do not need to buy everything at once, but understanding what each piece does and how it fits into your workflow will help you make smarter purchasing decisions over time.

Beginner Equipment List
- Audio Interface: A reliable USB audio interface with at least two inputs and high-quality preamps is the heart of your setup. Popular options include the Focusrite Scarlett 2i2 and the Universal Audio Volt 2.
- Studio Microphone: A large-diaphragm condenser microphone such as the Audio-Technica AT2020 or the Rode NT1-A captures vocals with warmth and detail.
- Studio Monitors: Near-field monitors like the Yamaha HS5 or KRK Rokit 5 provide accurate, flat frequency response for mixing and monitoring.
- Headphones: Closed-back headphones like the Audio-Technica ATH-M50x are essential for tracking without bleed.
- DAW Software: Free or affordable options like GarageBand, Reaper, or Cakewalk by BandLab give you professional recording and editing capabilities.
Intermediate and Advanced Upgrades
As your skills and ambitions grow, consider upgrading to a higher-end audio interface such as the Universal Audio Apollo series, adding outboard compressors and EQs, investing in studio-grade monitors like the Adam Audio T7V, or incorporating a dedicated hardware mixer for more complex routing and live sessions.
Budget Breakdown: How Much Does It Cost to Build a Sound Studio?
Your budget will determine the scale and quality of your sound studio, but the good news is that a competent setup can be built without breaking the bank. Below is a general cost comparison to help you plan.

| Budget Tier | Estimated Cost | What You Get |
| Starter | $300 – $800 | Basic audio interface, one condenser mic, entry-level monitors, free DAW, minimal acoustic panels |
| Mid-Range | $800 – $2,500 | Quality interface, premium condenser mic, full acoustic treatment, decent monitor pair, closed-back headphones |
| Professional | $2,500 – $7,000+ | High-end interface or mixer, multiple microphones, premium monitors, comprehensive acoustic treatment, outboard gear |
Remember that acoustic treatment is not an area to cut corners. Even with a modest microphone and interface, a well-treated room will produce dramatically better results than an expensive setup in an untreated space.
Step-by-Step Guide to Build a Sound Studio
- Choose Your Room: Select a rectangular interior room away from noise sources and exterior walls where possible.
- Plan Your Layout: Position your desk and monitors along the shortest wall with your listening position roughly one-third into the room length for optimal bass response.
- Install Acoustic Treatment: Mount absorption panels at first reflection points, place bass traps in every corner, and add diffusion to the rear wall.
- Set Up Your Equipment: Arrange your audio interface, computer, monitors, and microphone on a stable desk with proper cable management to reduce clutter and interference.
- Wire and Connect: Run balanced cables from your microphone and monitors through your interface, ensuring all connections are secure and grounded.
- Calibrate Your Monitoring: Use room measurement software like REW (Room EQ Wizard) to identify problematic frequencies and apply corrective EQ if needed.
- Test and Refine: Record test tracks, listen critically, and make incremental adjustments to placement and treatment until you achieve a balanced, accurate sound.
Common Mistakes People Make When Building a Sound Studio
Even experienced enthusiasts fall into traps when building a sound studio. One of the most common mistakes is buying expensive microphones before treating the room. A $2,000 microphone in a reflective, untreated room will still sound harsh and uneven. Another frequent error is placing monitors too close to walls or in corners, which exaggerates bass response and misleads your mixing decisions. Skipping bass traps is also a widespread mistake; low frequencies are the hardest to manage and the most damaging to mix accuracy. Finally, many builders underestimate the importance of cable quality and grounding, leading to persistent hum and noise issues that are difficult to diagnose later.
Final Thoughts on Building Your Sound Studio
Building a sound studio is a journey that combines creativity, technical knowledge, and practical problem-solving. Start with the fundamentals — a good room, proper acoustic treatment, and reliable core equipment — and expand as your skills and budget allow. The most important thing is to begin. You do not need a perfect space or the most expensive gear to start creating professional-quality audio. Every great studio was built step by step, and yours will be no different. Invest in learning, treat your space with care, and let your passion for sound guide every decision you make.
Frequently Asked Questions
What is the cheapest way to build a sound studio at home?
The most affordable approach is to use a small interior room, add DIY broadband absorption panels made from rockwool or fiberglass, invest in a budget audio interface around $100–$150, pair it with a budget condenser microphone, and use a free DAW like Audacity or Reaper. This starter setup can be assembled for under $500 while still delivering usable, professional-quality recordings.
How do you soundproof a room when building a sound studio?
Soundproofing requires adding mass, decoupling surfaces, sealing gaps, and damping resonance. Install dense insulation inside walls, use resilient channels or staggered studs to decouple drywall from framing, seal all door and window gaps with weatherstripping and acoustic caulk, and consider adding a second layer of drywall with Green Glue damping compound. Proper soundproofing is a structural effort and often the most expensive part of building a sound studio.
What is the minimum equipment needed to build a basic home sound studio?
You need an audio interface with at least one microphone input, a large-diaphragm condenser microphone, a pair of near-field studio monitors or quality headphones, a computer capable of running a DAW, and basic acoustic panels for the most critical reflection points. With these five essentials, you can record vocals, instruments, and produce full mixes.
How long does it take to build a sound studio from scratch?
For a basic home sound studio with moderate treatment, expect to spend one to three weekends on the full build. This includes room preparation, acoustic panel installation, equipment setup, and calibration. A more advanced studio with extensive soundproofing, custom treatment, and professional-grade gear may take four to eight weeks or longer, depending on the scope of construction and acoustic work involved.
Can I build a sound studio in a small bedroom?
Yes, you can build a sound studio in a small bedroom, but you will need to be strategic with space and treatment. Small rooms tend to exaggerate low frequencies, so prioritize bass traps in all corners and use absorption panels on the wall behind your listening position and at first reflection points. Keep your monitor placement close to the wall or use boundary EQ compensation to manage bass buildup. Many successful albums and podcasts have been produced in bedroom studios under 100 square feet.