If you have ever dreamed of laying down vocal tracks, producing beats, or recording instruments without draining your savings account, then you are in the right place. A budget recording studio is not about cutting corners—it is about making smart, informed decisions that prioritize sound quality over expensive gear. Over the past decade, the barrier to entry for home recording has dropped dramatically, and today, you can build a fully functional setup for a fraction of what professional studios charge. This guide covers everything from essential equipment and software to room treatment strategies and money-saving expert tips that will help you create studio-quality recordings on a tight budget.
What Is a Budget Recording Studio?
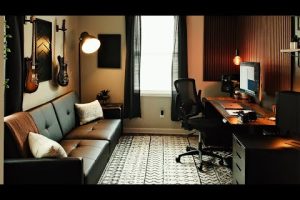
A budget recording studio refers to any recording environment—whether a spare bedroom, a garage, or a closet—set up with affordable gear that still delivers professional-grade results. The core philosophy revolves around maximizing audio fidelity per dollar spent. Unlike high-end commercial facilities that invest tens of thousands in premium monitors, vintage microphones, and acoustically treated rooms, a budget setup relies on modern technology that offers incredible value. Think entry-level audio interfaces, affordable condenser microphones, free or low-cost digital audio workstations, and DIY acoustic treatment. The goal is to produce clean, balanced tracks that compete with recordings made in far more expensive environments.
Essential Gear for a Budget Recording Studio Setup
Building a functional recording studio on a budget requires knowing exactly which pieces of equipment deliver the most impact. You do not need every gadget on the market—just the right essentials. Here is a breakdown of the core components every budget studio needs.
Audio Interface
The audio interface is the heart of any recording setup. It converts analog signals from your microphones and instruments into digital audio your computer can process. Budget-friendly options from brands like Focusrite, PreSonus, and Behringer offer excellent preamps, low-latency performance, and reliable drivers. Look for an interface with at least two inputs, phantom power for condenser microphones, and a headphone output for real-time monitoring.
Microphones
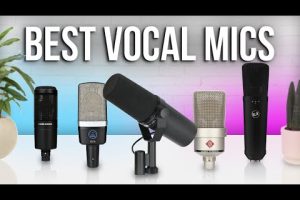
You do not need a collection of rare microphones to get great recordings. A single quality large-diaphragm condenser microphone can handle vocals, acoustic guitar, and a variety of instruments. The Audio-Technica AT2020, the Rode NT1, and the Samson C01 are all fantastic options that retail well under $200. If your budget allows a second microphone, a dynamic option like the Shure SM58 or the SE Electronics sE7 adds versatility for louder sources like guitar amps and snare drums.
Studio Monitors and Headphones
Accurate monitoring is non-negotiable, even in a budget studio. Nearfield monitors like the Yamaha HS5 or the KRK Rokit 5 deliver a flat frequency response that helps you make informed mixing decisions. Pair these with a decent pair of closed-back headphones such as the Audio-Technica ATH-M50x or the Sony MDR-7506 for tracking and detailed editing sessions.
How Much Does It Really Cost to Build a Budget Recording Studio?
One of the most common questions aspiring producers ask is: what is a realistic budget for a home recording studio? The answer depends on how far you are willing to go, but here is a general breakdown of costs for different tiers of a budget recording setup.
| Tier | Estimated Cost | What You Get |
| Entry-Level Budget | $200 – $400 | Basic audio interface, one condenser mic, headphones, free DAW |
| Mid-Range Budget | $400 – $800 | Better interface, two mics, entry-level monitors, affordable DAW |
| Advanced Budget | $800 – $1,500 | Premium interface, multiple mics, quality monitors, acoustic treatment, premium plugins |

Keep in mind that these figures are for equipment only and do not include furniture, computer costs, or ongoing expenses like software subscriptions. The good news is that many of the best free DAWs available today—such as Cakewalk by BandLab, Tracktion Waveform Free, and Ardour—can rival paid alternatives in functionality, giving your dollar even more purchasing power.
Best Budget Recording Studio Equipment Compared
When shopping on a budget, it helps to compare popular options side by side. The table below highlights some of the most recommended budget-friendly gear for home recording studios, including price ranges and key features to help you decide which items align with your recording goals and financial constraints.
| Equipment | Approx. Price | Key Strength |
| Focusrite Scarlett Solo | $120 | Reliable preamp, easy setup, great driver support |
| PreSonus AudioBox USB 96 | $100 | Studio One software included, solid build |
| Rode NT1 5th Gen | $230 | Ultra-low self-noise, versatile for vocals and acoustic instruments |
| Yamaha HS5 Monitor Pair | $350 | Flat frequency response, excellent stereo imaging |
| Samson SR850 Headphones | $50 | Open-back design, detailed sound, affordable |
| Foam acoustic panels (12-pack) | $40 | Basic echo control, easy wall mounting |
Each of these items represents a strong value proposition. None of them will break the bank, and together they form a capable foundation for recording, editing, and mixing music that sounds polished and professional.
Room Treatment and Acoustic Tips on a Budget
Gear matters, but your room matters just as much. Even the most expensive microphone will capture reflections, resonances, and standing waves in an untreated space. The good news is that you do not need to spend thousands on professional acoustic panels to improve your room significantly.
Start with the simplest and cheapest treatment available: thick blankets, moving blankets, or even heavy curtains draped behind your microphone and around reflective surfaces. These absorb high-frequency reflections and reduce flutter echo. For low-frequency buildup in corners—commonly called bass buildup—place DIY bass traps made from dense mineral wool or rigid fiberglass wrapped in fabric. These can be built for a fraction of the cost of commercially available options.

Another budget-friendly strategy is microphone placement. Experiment with distance from walls, positioning in room corners, and angling your mic to avoid direct exposure to reflective surfaces. Sometimes the best acoustic treatment costs nothing more than strategic placement and careful listening.
DAW Options for Budget-Conscious Producers
Your digital audio workstation is where the magic happens—the place you record, edit, mix, and master your tracks. Fortunately, there are outstanding DAW options available at little to no cost. Cakewalk by BandLab is a fully featured, professional-grade DAW that is completely free and includes a comprehensive set of virtual instruments, effects, and mixing tools. Tracktion Waveform Free offers an intuitive workflow with unlimited tracks and a generous feature set. For those who prefer open-source software, Ardour provides a highly customizable recording and editing environment with no licensing fees whatsoever.
If you are willing to invest a small amount in paid software, Reaper offers an extended free trial and is widely regarded as one of the most cost-effective DAWs on the market, with a personal license costing around $60. Ableton Live Lite often comes bundled with audio interfaces and MIDI controllers, giving you access to a powerful workflow without an additional purchase.
Expert Tips to Maximize Quality Without Breaking the Bank
Here are proven strategies that experienced producers and engineers use to get the most out of a limited budget.
- Invest in one great microphone instead of five mediocre ones. A single high-quality condenser or dynamic mic will outperform a collection of cheap alternatives in terms of clarity and character.
- Prioritize room acoustics over expensive gear. A well-treated room with average microphones will always sound better than a bare room with top-of-the-line equipment.
- Learn your DAW inside and out. Understanding compression, EQ, and reverb techniques can transform a flat recording into a polished mix without spending a dime on third-party plugins.
- Use free plugins from reputable developers. Companies like Voxengo, TDR, and Klevgrand offer world-class plugins at no cost that rival expensive commercial alternatives.
- Record multiple takes and comp the best parts. This technique, borrowed from professional studios, eliminates the need for expensive gear by leveraging performance quality and editing skill.
- Buy used or refurbished equipment. Websites like Reverb, eBay, and Guitar Center’s used section are treasure troves for budget-conscious producers looking for higher-end gear at discounted prices.
Conclusion
Building a budget recording studio is one of the most rewarding investments a musician, podcaster, or content creator can make. The days when professional-quality recording required a significant financial commitment are long gone. With thoughtful gear choices, smart room treatment, a capable free DAW, and a willingness to learn the craft, you can produce recordings that rival those made in studios costing thousands more. Start with the essentials, grow your setup gradually, and focus on improving your skills as a producer and engineer. The best budget recording studio is not the cheapest—it is the one that helps you make the best music possible.
Frequently Asked Questions
What is the cheapest way to set up a budget recording studio at home?
The most affordable approach is to use a free DAW like Cakewalk by BandLab, a budget USB microphone such as the Fifine K669B, and a pair of headphones. Add a reflection filter behind the mic and hang blankets on your walls to control reflections. This setup can cost under $100 and still produce usable, respectable recordings for vocals, voiceover, and acoustic instruments.
Can a budget recording studio produce professional-quality audio?
Absolutely. Professional-quality audio is determined more by technique, room acoustics, and mic placement than by the price tag on your equipment. Many commercially released tracks have been produced entirely in budget home studios. What matters is that you invest time in learning recording fundamentals and treating your space thoughtfully.
Which audio interface is best for a budget recording studio in 2024?
The Focusrite Scarlett Solo and the Focusrite Scarlett 2i2 remain top picks for budget-conscious producers. They offer clean preamps, low latency, durable build quality, and reliable driver support. The PreSonus AudioBox USB 96 is another excellent alternative that often comes bundled with Studio One Artist software, adding significant value for the price.
Do I need acoustic panels in a budget recording studio?
While not strictly necessary, acoustic treatment dramatically improves recording quality by reducing unwanted reflections and resonances. Budget alternatives such as thick moving blankets, DIY panels made from mineral wool, and strategic furniture placement can deliver meaningful improvements without the high cost of commercial acoustic products.
Is it better to buy a complete budget recording studio bundle or individual components?
Bundles can offer excellent value, especially if they include an interface, microphone, and accessories at a discounted price. However, buying components individually allows you to choose each piece based on its specific quality and suitability for your recording needs. Evaluate bundle contents carefully and compare individual item reviews before deciding.