


Setting up an at home studio has become one of the most transformative moves for creators across every discipline — from musicians and podcasters to videographers and voice-over artists. What was once reserved for professionals with expensive commercial spaces is now entirely achievable inside a bedroom, garage, or spare room. Whether you are a complete beginner taking your first steps or an experienced creator looking to refine your setup, building a home recording studio requires more than just buying gear. It demands thoughtful planning, a solid understanding of acoustics, and strategic equipment choices that align with your creative goals. This comprehensive guide walks you through everything you need to know about creating a professional-quality at home studio, from room preparation and essential gear to expert-level tips that elevate your recordings from amateur to broadcast-ready.
What Exactly Is an At-Home Studio?

An at-home studio is any dedicated space within your residence where you can create, record, edit, and produce professional-quality audio or video content. The definition has expanded significantly over the past decade. While a traditional home studio might have focused solely on music production — think a MIDI keyboard, audio interface, and a pair of studio monitors — today’s at home studio setups span a wide creative spectrum. You might be building a podcast recording booth, a YouTube filming station, a voice-over booth, or a full music production suite. The core principle remains the same: you need a controlled environment and the right tools to capture clean, polished content without stepping outside your front door.
The beauty of a modern home studio setup lies in its flexibility. You can scale your equipment over time, starting with essentials and gradually upgrading as your skills and budget grow. This accessibility has democratized content creation, allowing independent artists and entrepreneurs to compete with large production houses — all from the comfort of home.
How to Set Up Your At-Home Studio on Any Budget
One of the biggest advantages of a home recording studio is that you do not need to spend a fortune to get started. The key is understanding what matters most at each budget tier and where you can save money without sacrificing quality. Below is a breakdown of studio setups across three common budget ranges.
Budget-Friendly At-Home Studio (Under $300)
Starting lean does not mean starting poorly. A budget studio setup can produce surprisingly good results if you focus on the essentials.
- A decent USB condenser microphone such as the Audio-Technica AT2020 or Fifine K669B
- A pair of budget studio headphones like the Audio-Technica ATH-M20x
- Free or low-cost DAW software such as Audacity, GarageBand, or Reaper
- A simple pop filter and a basic desktop mic stand
- DIY acoustic treatment using blankets, pillows, or budget foam panels
Mid-Range Home Recording Studio ($300–$1,000)
At this level, you unlock professional-grade audio interfaces and higher-quality microphones that dramatically improve your sound.
- A dedicated audio interface such as the Focusrite Scarlett Solo or PreSonus AudioBox
- A large-diaphragm condenser microphone like the Rode NT1 or Audio-Technica AT2035
- Closed-back studio headphones for monitoring and tracking
- A pair of entry-level studio monitors such as the PreSonus Eris E3.5 or KRK Rokit 5
- Basic acoustic panels and a reflection filter for your microphone
- A USB or MIDI controller keyboard for music production
Professional At-Home Studio ($1,000+)
When you are serious about production quality, investing in a high-end home studio setup pays dividends in every recording session.
- A multi-channel audio interface like the Focusrite Scarlett 18i20 or Universal Audio Apollo
- Premium microphones including the Shure SM7B or Neumann TLM 102
- Reference-grade studio monitors such as the Adam Audio T7V or Yamaha HS8
- A professional DAW like Ableton Live, Logic Pro, or Pro Tools
- Comprehensive acoustic treatment with absorption and diffusion panels
- A dedicated PC or Mac with high-RAM and fast storage for large project files
- Video equipment if you are producing multimedia content — a DSLR or mirrorless camera with a quality lens
Essential Equipment for Your At-Home Studio
Every home studio needs a core set of equipment regardless of your creative discipline. Understanding what each piece does and why it matters helps you make informed purchasing decisions. Below is a detailed comparison of the must-have items and where to prioritize your spending.
| Equipment | Budget Option | Mid-Range Option | Professional Option |
| Microphone | USB Condenser (Fifine K669B) | XLR Condenser (Rode NT1) | Dynamic Mic (Shure SM7B) |
| Audio Interface | Built-in USB (no interface needed) | Focusrite Scarlett Solo | Universal Audio Apollo Twin |
| Headphones | Audio-Technica ATH-M20x | Beyerdynamic DT 770 Pro | Sennheiser HD 650 |
| Studio Monitors | PreSonus Eris E3.5 | KRK Rokit 5 G4 | Adam Audio T7V |
| DAW Software | GarageBand / Audacity (Free) | Reaper ($60 license) | Pro Tools / Logic Pro |
| Acoustic Treatment | DIY blankets & pillows | Foam panels (12-pack) | Custom acoustic wall panels |
When choosing equipment, remember that the microphone and audio interface are the heart of your home recording studio. A great microphone captures your voice or instrument with clarity and warmth, while a quality interface ensures that signal path remains clean and free from noise or latency. Many beginners make the mistake of overspending on accessories before investing in these two critical components.
Room Acoustics and Sound Treatment
Even the most expensive gear in the world cannot save a poorly treated room. Acoustic treatment is arguably the single most important factor in achieving professional sound from your at home studio. Without proper treatment, you will hear unwanted reflections, echoes, and frequency buildups that muddy your recordings and mixes.
Start by identifying the primary reflection points in your room — the walls and ceiling directly opposite your recording position. Placing absorption panels at these points dramatically reduces flutter echo and standing waves. Bass traps in the corners of your room tame low-frequency rumble that no microphone can fully avoid.
Common Acoustic Mistakes to Avoid
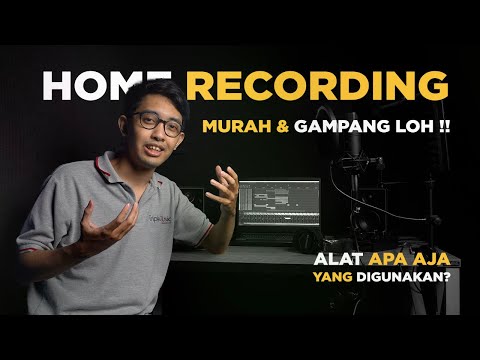
- Covering every surface with foam. Over-treating a room kills natural liveliness and creates an unnaturally dead sound. Balance absorption with some diffusion.
- Ignoring room geometry. Square rooms create problematic standing waves. Position your recording area asymmetrically and use angled panels where possible.
- Relying on cheap foam alone. Thin foam panels only absorb high frequencies and do nothing for low-end issues. Use thick mineral wool or fiberglass panels for full-spectrum absorption.
- Treating the room after recording. Always treat your space before you start recording, not during post-production. You cannot fix a bad room sound in the mix.
For creators on a tighter budget, household items like heavy curtains, bookshelves filled with unevenly sized books, and thick rugs can serve as effective diffusers and absorbers. The goal is to create a space where your microphone captures the true sound of your voice or instrument, not the echo of the room itself.
Best Practices for Recording and Producing at Home
Building the physical studio is only half the equation. Developing strong workflows and habits inside your at home studio is what separates amateur recordings from professional output. Here are some expert-level practices to adopt immediately.
1. Prioritize Gain Staging
Proper gain staging means setting your input levels so your signal is strong enough to capture detail but never clips or distorts. Aim for peaks around -12 dB to -6 dB on your meter. This gives you headroom for loud passages and makes mixing far easier.
2. Record in a Quiet Environment
Turn off HVAC systems, fans, refrigerators, and any other noise sources during recording sessions. Close windows and doors. Use a noise gate during editing if necessary, but always try to capture the cleanest possible signal at the source.

3. Learn Your DAW Inside and Out
Spend real time mastering your digital audio workstation. Learn keyboard shortcuts, understand routing and bussing, and practice mixing with reference tracks. The better you know your tools, the faster and more creatively you can work.
4. Use Reference Tracks
Compare your mixes against professionally produced tracks in a similar genre. This practice sharpens your ears and helps you identify imbalances in frequency, stereo width, and dynamic range that you might otherwise miss.
5. Take Breaks and Trust Your Ears
Ear fatigue is real and dangerous. After an hour or two of mixing, step away. Come back with fresh ears and you will immediately hear problems you missed before. Your at home studio is a marathon, not a sprint.
Frequently Asked Questions
What is the minimum equipment needed to start an at-home studio for podcasting?
For a basic podcast setup, you need a USB condenser microphone or a dynamic microphone with an XLR-to-USB adapter, a pair of closed-back headphones, and a DAW or hosting platform with recording capabilities. A pop filter and a quiet, treated corner of your room will cover the rest. Many successful podcasters start with nothing more than a $100 microphone and free software before upgrading over time.
How do I soundproof my at-home studio on a budget?
True soundproofing involves blocking sound from entering or leaving a room, which requires mass, density, and decoupling. Budget-friendly approaches include sealing gaps around doors with weatherstripping, hanging heavy moving blankets over windows, and adding mass-loaded vinyl to walls. Keep in mind that acoustic treatment (managing sound within the room) and soundproofing (blocking sound from passing through walls) are two different goals, and beginners often confuse them.
Can a laptop handle at-home studio production, or do I need a desktop computer?
Modern laptops are more than capable of running a home recording studio, especially for podcasting, voice-over work, and light music production. However, if you plan to work with large sample libraries, multiple virtual instruments, or complex mixing sessions with dozens of tracks, a desktop computer with a dedicated audio interface and ample RAM (32 GB or more) will provide a smoother and more stable workflow.
What is the best room to use for an at-home studio?
Choose the smallest, most isolated room available in your home. Bedrooms, walk-in closets, and converted garages all work well. The key factors are minimal external noise, few hard parallel surfaces (which cause reflections), and enough space for you to set up your equipment comfortably without feeling cramped. Rooms with carpeting and plenty of soft furnishings naturally dampen reflections better than bare rooms with hardwood floors and tall ceilings.
Do I need an audio interface if I use a USB microphone?
If you are using a USB microphone, you do not need a separate audio interface because the conversion from analog to digital happens inside the microphone itself. However, an audio interface becomes essential if you plan to use XLR microphones, connect multiple microphones simultaneously, use studio monitors for real-time monitoring, or integrate outboard gear like compressors and preamps into your signal chain. Investing in an interface early gives your at home studio room to grow as your ambitions expand.
Conclusion
Building an at home studio is one of the most rewarding investments a modern creator can make. It gives you the freedom to work on your own schedule, iterate without time pressure, and produce content that genuinely reflects your unique voice and vision. Whether you are just starting out with a USB microphone and free software or assembling a fully treated professional-grade setup, the journey itself teaches you invaluable skills about sound, storytelling, and creative problem-solving. Start with what you can afford, prioritize quality over quantity, treat your room acoustically, and never stop learning. Your home studio is not just a workspace — it is the foundation of your entire creative practice, and with the right approach, it can produce results that rival any commercial facility in the world.