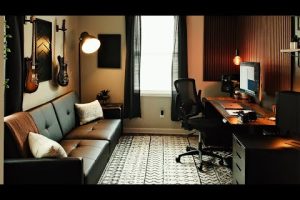
Building a music studio — whether you are a bedroom producer, a seasoned session musician, or a professional engineer — is one of the most rewarding investments you can make in your creative career. The process involves far more than purchasing gear and plugging things in. It requires thoughtful room selection, acoustic treatment, equipment decisions, and workflow planning. This comprehensive guide walks you through every critical phase of creating a functional, inspiring music production space from the ground up. Whether you are starting from scratch on a tight budget or upgrading an existing setup to professional standards, these strategies will help you build a studio that sounds great and supports your artistic vision.
Why Building a Music Studio Is Worth the Effort
Owning a dedicated recording and production environment gives you creative control that rented studios simply cannot match. When you build a music studio tailored to your needs, you eliminate booking fees, commute time, and the pressure of limited session hours. Over time, a well-designed home studio pays for itself through completed projects, demo recordings, and the ability to collaborate with artists remotely. Beyond cost savings, a personal studio allows you to experiment freely, iterate on ideas at midnight, and develop a signature sound that becomes synonymous with your brand.
For beginners, the journey starts with understanding core concepts like signal flow, frequency response, and monitoring accuracy. Intermediate producers benefit from refining acoustic treatment and expanding their equipment inventory. Advanced engineers focus on optimizing workflow, integrating outboard gear, and achieving mix translation across different playback systems. Regardless of your level, the principles outlined below apply universally.
Planning Your Home Music Studio Setup
Choosing the Right Room
The single most important decision in building a recording studio is selecting the right space. Many newcomers make the mistake of treating room size as the primary factor, but shape, construction materials, and external noise levels matter just as much. Here are key considerations when evaluating rooms:
- Room shape: Rectangular rooms perform better than square ones because they reduce standing waves and flutter echoes. Avoid rooms with parallel walls whenever possible.
- Ceiling height: Higher ceilings (at least eight feet) provide better low-frequency dispersion and reduce bass buildup near the floor.
- External noise: Choose a room away from street traffic, HVAC units, and neighboring spaces. Interior rooms on higher floors typically experience less ambient noise than ground-floor options.
- Surface materials: Rooms with carpeted floors, drywall construction, and minimal glass surfaces are easier to treat acoustically than rooms with hard tile, concrete, or large windows.
Once you have identified a candidate room, spend a few days listening to it. Play music at various volumes and note any resonances, rattles, or buzzing. These observations will guide your acoustic treatment decisions later.
Budgeting for Your Studio Build
A clear budget prevents overspending and ensures you prioritize the gear that has the greatest impact on sound quality. Below is a rough cost breakdown for three tiers of studio builds:
| Category | Budget Tier ($500–$1,500) | Mid-Range ($1,500–$5,000) | Professional ($5,000–$15,000+) |
| Audio Interface | Entry-level USB (Focusrite Scarlett Solo) | Mid-range 2-in/2-out (Universal Audio Volt 2) | Premium multi-channel (RME Fireface UCX II) |
| Microphones | 1 large-diaphragm condenser | 1 condenser + 1 dynamic + 1 ribbon | Full collection including specialty mics |
| Studio Monitors | 5-inch pair (Presonus Eris E5) | 6–8 inch pair (Adam Audio T7V) | High-end 8-inch+ (Neumann KH 310) |
| Headphones | Closed-back (Audio-Technica ATH-M50x) | Closed + open pair | Reference-grade closed + custom IEMs |
| Acoustic Treatment | Basic foam panels (6–8 pieces) | Hybrid panels + bass traps | Full room calibration + diffuser arrays |
| DAW Software | Free or bundled (GarageBand, Reaper) | Standard DAW license (Logic, Ableton) | Multiple licenses + plugin suites |
| Total Estimated Cost | $500–$1,500 | $1,500–$5,000 | $5,000–$15,000+ |
Remember that acoustics and monitoring accuracy deliver more audible improvement than expensive microphones or plugins. Invest in your room and your speakers before chasing the latest gear.
Essential Equipment for Your Music Production Studio
Audio Interface and Microphones
Your audio interface serves as the central hub connecting microphones, instruments, and your computer. When selecting an interface, prioritize preamp quality, latency performance, and the number of inputs you realistically need. A 2-in/2-out configuration works for most solo producers, while collaborative projects or multi-mic drum recordings may require eight or more inputs.
For microphones, a large-diaphragm condenser is the workhorse of vocal and acoustic instrument recording. Pair it with a dynamic microphone like the Shure SM57 or SM7B for louder sources such as guitar amplifiers, snare drums, and brass instruments. Ribbon microphones add warmth and character to electric guitars and room ambience, making them a valuable addition at the intermediate and advanced levels.
Studio Monitors and Headphones
Accurate monitoring is the backbone of mixing and mastering. Nearfield studio monitors placed at ear height and angled toward your listening position deliver the most reliable frequency response for small to medium rooms. Look for monitors with a flat frequency response and minimal coloration. Popular choices include the Yamaha HS7, KRK Rokit 7, and Adam Audio T7V.
Headphones serve a different purpose than monitors — they reveal details like room noise, clicks, and subtle artifacts that monitors might mask. Invest in both closed-back headphones for tracking and open-back headphones for mixing. The Sennheiser HD 650, Beyerdynamic DT 770 Pro, and Sony MDR-7506 are industry-standard options across all budget levels.
Room Acoustics and Soundproofing
Acoustic Treatment vs. Soundproofing
One of the most common misconceptions in studio building is confusing acoustic treatment with soundproofing. Soundproofing prevents sound from entering or leaving your room, which requires mass, decoupling, and sealed air gaps. Acoustic treatment controls reflections, resonances, and standing waves inside the room. You need both if your goal is professional-quality recordings, but they are fundamentally different processes.
Here is a practical approach to treating your room:
- First reflection points: Place absorption panels on the side walls at the points where sound from your monitors first bounces before reaching your ears. These spots are typically found by sitting in your mix position and angling a mirror on the wall until you see the monitor cones.
- Bass traps: Corner-mounted bass traps absorb low-frequency energy that accumulates in room corners. Triangular or cylindrical traps filled with dense mineral wool are highly effective.
- Ceiling cloud: A suspended absorptive panel above your mix position reduces vertical reflections that muddy your stereo image.
- Diffusers: Rear wall diffusers scatter reflections rather than absorbing them, preserving a natural room feel while preventing flutter echo.
Do not cover every surface with foam. Over-treating a room creates a dead, unnatural sound. Aim for a balanced approach — roughly 30 to 40 percent wall coverage with a mix of absorption and diffusion.
Software and Digital Audio Workstations (DAWs)
Your DAW is where all the creative magic happens. The right software depends on your genre, workflow preferences, and budget. Ableton Live excels for electronic music producers and live performers with its session view and intuitive clip-based workflow. Logic Pro offers a comprehensive feature set for macOS users at a one-time purchase price, making it exceptional value for singer-songwriters and full-band producers. Pro Tools remains the industry standard for professional recording studios and post-production work. Reaper is a lightweight, highly customizable option that punches far above its price point, making it ideal for beginners exploring production.
Beyond the DAW, invest in a reliable collection of virtual instruments, effects plugins, and sample libraries. Start with essentials — an EQ, compressor, reverb, and a versatile synth — and expand your toolkit as your skills develop. Avoid plugin overload early on; mastering a smaller set of tools produces better results than juggling fifty unfamiliar plugins.
Expert Tips for Maximizing Your Studio Workflow

- Label everything: Cable management and consistent labeling of inputs, outputs, and track channels saves hours of confusion during sessions.
- Calibrate your monitors: Use measurement software like Room EQ Wizard or REW to identify frequency issues and set appropriate monitor levels at your mix position.
- Build templates: Create session templates with pre-routed buses, effect chains, and naming conventions to streamline your starting process.
- Take regular breaks: Ear fatigue degrades your judgment rapidly. Follow the 50-minute-on, 10-minute-off rule to maintain mixing accuracy.
- Reference tracks: Load professionally mixed songs into your DAW and compare them frequently. This habit trains your ear and exposes weaknesses in your mix.
- Version your projects: Save incremental versions of every session. This safety net prevents lost work and lets you audition different arrangement ideas without risk.
Frequently Asked Questions (FAQs)
What is the minimum budget needed to build a home music studio?
A functional beginner studio can be assembled for around $500 to $1,000. This budget typically covers a basic audio interface like the Focusrite Scarlett Solo, one condenser microphone, a pair of budget studio monitors, closed-back headphones, and a DAW license or free software such as Reaper or GarageBand.
Do I need soundproofing if I am only recording vocals at home?
Soundproofing is essential if you want to prevent noise from bothering neighbors or if external noise contaminates your recordings. At minimum, seal gaps around doors with weatherstripping, hang heavy blankets or acoustic curtains over windows, and consider a portable vocal isolation shield for single-source recording.
Which DAW is best for beginners building their first studio?
Reaper and GarageBand are the most accessible starting points. Reaper offers a full-featured, fully functional free trial with no time limit, while GarageBand comes free on all Apple devices. Both allow you to learn core production concepts without financial commitment before upgrading to more advanced platforms.
How much acoustic treatment does a small studio really need?
A small room (under 200 square feet) typically needs at least six to eight absorption panels, two to four corner bass traps, and one ceiling cloud. This combination addresses first reflections, bass buildup, and vertical flutter echoes. The exact number depends on room dimensions, surface materials, and your monitoring distance.
Can I build a professional-quality studio on a limited budget?
Absolutely. Professional-quality results depend more on room acoustics, monitoring accuracy, and mixing technique than on expensive equipment. A well-treated room with mid-range monitors and a skilled producer will always outperform an untreated room filled with high-end gear.
Final Thoughts on Building Your Music Studio
Building a music studio is a journey that evolves alongside your skills and ambitions. Start with the essentials — a quiet room, accurate monitoring, a reliable audio interface, and a capable DAW — and expand methodically as your needs become clearer. Prioritize acoustic treatment and listening accuracy over gear accumulation. The best studio in the world is useless if you cannot hear what is happening inside it clearly and honestly.
Take your time planning, invest wisely in treatment and monitoring, and resist the temptation to buy everything at once. A thoughtfully built studio becomes a creative sanctuary — a place where ideas flow freely, experiments succeed, and your unique sound takes shape. Start with what you can afford today, and continuously refine your space as your craft deepens. The studio you build now will grow with you for years to come.